When Android 4.4 KitKat was released, everyone was excited to see the new translucent status bar and navigation bar. It adds a whole new level of beauty to the operating system. After seeing Trello implement it so well, I wanted to implement it in my own apps. It took me a while with some research to sort some things out, so I thought I would post how I did it to help others and probably myself again at some point in the future.
The Goal
We will be making the status bar (the black bar on the top of the screen) transparent, along with the navigation bar (the black bar at the bottom of the screen). The main source of my original troubles was trying to make the transparent navigation bar correctly overlap with the ListView and display list items as they scroll under the navigation bar.

Part 1 — Initial Setup
First, we will make the status bar and navigation transparent. You must have two folders inside the /res folder of your project: values and values-v19. Files in the values-19 folder will be used on API 19 (4.4 KitKat), files in the values folder will be used on anything below API 19. Then you must create two files, both called styles.xml, one for each values folder; the contents should look similar to what’s shown below.
/values/styles.xml
<?xml version=”1.0″ encoding=”utf-8″?>
<resources>
<style name=”Theme.TransparencyDemo” parent=”@android:style/Theme.Holo.Light”/>
</resources>
/values-v19/styles.xml
<?xml version=”1.0″ encoding=”utf-8″?>
<resources>
<style name=”Theme.TransparencyDemo” parent=”@android:style/Theme.Holo.Light”>
<item name=”android:windowTranslucentStatus”>true</item>
<item name=”android:windowTranslucentNavigation”>true</item>
</style>
</resources>
You then must set the Theme.TransparencyDemo theme to your application through its manifest:
…
<application android:label=”@string/app_name”
android:icon=”@drawable/ic_launcher”
android:theme=”@style/Theme.TransparencyDemo”>…
In the layout containing your list, add two attributes to your ListView:
<?xml version=”1.0″ encoding=”utf-8″?>
<ListView xmlns:android=”http://schemas.android.com/apk/res/android”
android:id=”@android:id/list”
android:layout_width=”fill_parent”
android:layout_height=”fill_parent”
android:fitsSystemWindows=”true”
android:clipToPadding=”false”/>
The fitsSystemWindows attribute makes your ListView fit to the edges of the action bar and navigation bar (instead of going under them), and clipToPadding makes items of your ListViews and ScrollViews scroll under the navigation bar (and allows the last item in the list scroll all the way up until it just passes the navigation bar). These attributes can also be added to your actual theme (in /values-v19/styles.xml), but that may not be right for all cases.
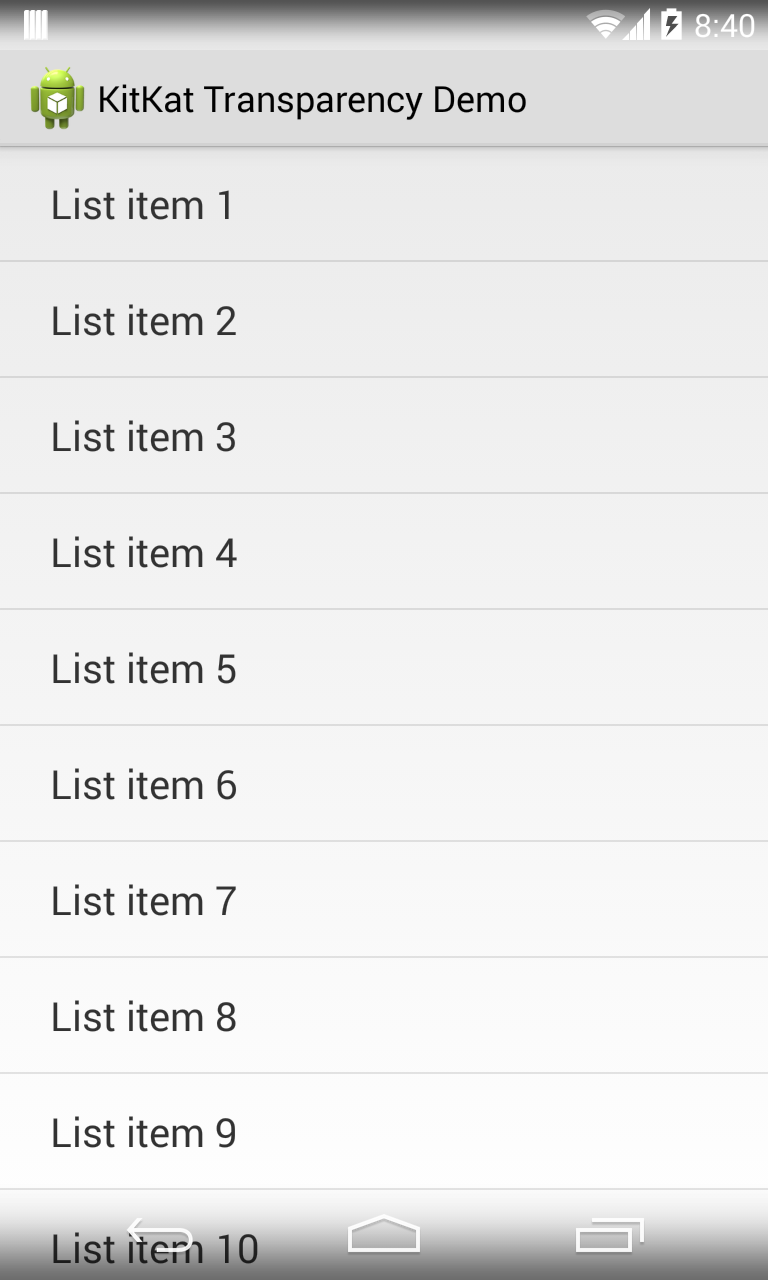
Here’s the result of the new theming; the status bar matches the background color of the activity window and the navigation bar is fully transparent:
Part 2 — Status Bar Tint
We now have transparency working as it should, however you’ll notice the status bar doesn’t match the color of the action bar like most would want. That’s because when transparency for the status bar is enabled, it will match the color of the window background which in this case is the color you see displayed in the background of the ListView. One way to solve this is by setting the android:windowBackground attribute in your theme, however this would change the entire background color of your app. I found a useful library, SystemBarTint, that allows you to set the tint color of your status bar.
Once you have the library on your computer and added as a library reference to your project, add something like the following to onCreate() of your main activity. I would recommend using setStatusBarTintResource() instead of explicitly using a color, but this works for the example:
// Only set the tint if the device is running KitKat or above
if (Build.VERSION.SDK_INT >= Build.VERSION_CODES.KITKAT) {
SystemBarTintManager tintManager = new SystemBarTintManager(this);
tintManager.setStatusBarTintEnabled(true);
// Holo light action bar color is #DDDDDD
int actionBarColor = Color.parseColor(“#DDDDDD”);
tintManager.setStatusBarTintColor(actionBarColor);
}
The result:

Part 3 — Landscape
You’ll notice when you go into landscape on a KitKat device that the navigation bar turns black and overlaps with your content where it shouldn’t. This can be solved using a boolean value that enables or disables translucent navigation based on screen orientation. Create a bools.xml file in /res/values-v19 and in /res/values-land-v19:
/values-v19/bools.xml:
<?xml version=”1.0″ encoding=”utf-8″?>
<resources>
<bool name=”transparent_nav”>true</bool>
</resources>
/values-land-v19/bools.xml:
<?xml version=”1.0″ encoding=”utf-8″?>
<resources>
<bool name=”transparent_nav”>false</bool>
</resources>
Then all you need to do is modify your theme in /values-v19/styles.xml:
<?xml version=”1.0″ encoding=”utf-8″?>
<resources>
<style name=”Theme.TransparencyDemo” parent=”@android:style/Theme.Holo.Light”>
<item name=”android:windowTranslucentStatus”>true</item>
<item name=”android:windowTranslucentNavigation”>@bool/transparent_nav</item>
</style>
The boolean value will change when your activity’s configuration changes when the screen orientation changes.
Part 4 — Fragment Transactions Messing Up Padding?
Are you using Fragments and FragmentTransactions in your app? Have you noticed that when you go through a fragment transaction, the effect of fitsSystemWindows=”true” goes away and your fragment gets covered by the action bar and the navigation bar? I’ve found a solution to this from the SystemBarTint library we used to set the status bar color.
First, add this method to your Fragment:
public static void setInsets(Activity context, View view) {
if (Build.VERSION.SDK_INT < Build.VERSION_CODES.KITKAT) return;
SystemBarTintManager tintManager = new SystemBarTintManager(context);
SystemBarTintManager.SystemBarConfig config = tintManager.getConfig();
view.setPadding(0, config.getPixelInsetTop(true), config.getPixelInsetRight(), config.getPixelInsetBottom());
}
Now in your Fragment, override onViewCreated() if you haven’t already and make it look like this:
@Override
public void onViewCreated(View view, Bundle savedInstanceState) {
super.onViewCreated(view, savedInstanceState);// This could also be a ScrollView
ListView list = (ListView) view.findViewById(android.R.id.list);
// This could also be set in your layout, allows the list items to scroll through the bottom padded area (navigation bar)
list.setClipToPadding(false);
// Sets the padding to the insets (include action bar and navigation bar padding for the current device and orientation)
setInsets(list);
}
This will set the padding of the ListView in your Fragment to be below the action bar and status bar, and above the navigation bar if the device has one. Setting clipToPadding to false allows last item in the ListView to scroll up above the navigation bar, but you can see all the list items as they go under the transparent navigation bar.
NOTE: you will probably wanna set fitsSystemWindows=”true” to the empty text and/or progress view of your fragment layout so they center in your layout as they should.
Wrapping Up
Want to see this demo in action on your phone? Get the code and APK file from this repository.

This helped me, thanks 🙂
How would you achieve this if you had to implement a Navigation Drawer?
How would you achieve this if you had to implement a Navigation Drawer?
Add padding to the top of the navigation drawer ListView
Thank you so very much! This was an excellent tutorial!
This crashes for me on devices < KitKat. Any Ideas?
Hey man, great tutorial!
Do you have any idea why the scroll under navigation bar doesnt work with RecylerView?
Regards